There are a few reasons why I love making these Beeswax Candles.
- I LOVE CANDLES. I'm a should-be Dane, and the level of coziness in my home is quite intentional. And quite high.
- As much as I adore wonderful-smelling candles, I always question what they put in them. Soy candles are great because they are much safer and aren't toxic for you and your family to breathe in. But BEESWAX CANDLES actually PURIFY the air around them. WHAT? Yeah. That's why I go to all the trouble. Also, I really enjoy making different concoctions of scents with my essential oils!
- They are SO easy. If you can purchase all your supplies ahead of time and have them on hand, the time it actually takes to make these candles is minimal! Let's be honest- I don't have 8 hours to spend DIY-ing, and neither do you.
This recipe is adapted from Wellness Mama's Beeswax Candle Recipe, which I have used multiple times over now and LOVE because of the simplicity of it!
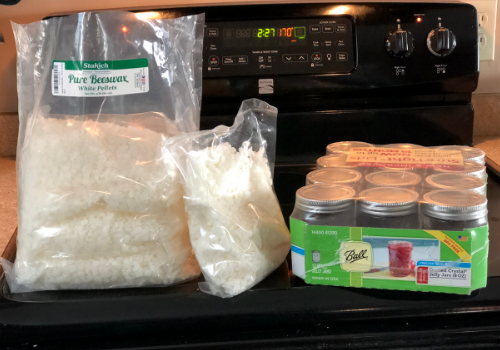
Ingredient list:
- 1lb of white beeswax pellets (I order mine here, but I will admit- I purchase 5lbs at a time!)
- 1/2 cup of coconut oil
- Candle wicks (this is what I use, and so far it has gotten me through over 10lbs of beeswax candles!)
- 3 half-pint canning jars or empty candle jars (but I also LOVE to repurpose candle jars!!)
- A metal pitcher (something to use for the wax- and I will warn you, it's a HASSLE to clean, so choose or purchase something you plan to reuse for candle-making only)
- Large pot to boil water in (this creates the double-boiler effect)
- Pencils or chopsticks (something long and thin to tie the top of the wick to)
- Hot glue gun
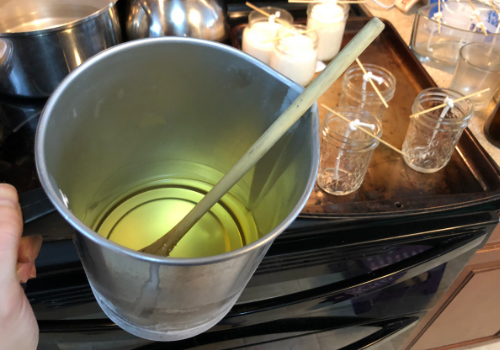
Step 1: Fill your large pot about 3/4 full of water and place on high heat. Pour beeswax into your metal pitcher, and place inside the large pot. Make sure that there is not so much water in it that it could potentially boil over into the pitcher. It will take a good 15-20 minutes for the beeswax to melt completely, so you have plenty of time to work on the next few steps in the meantime.
I include an extra step in my own candle-making where I melt down my old candles and clean them out, so I started this process before melting my beeswax on the stovetop. Here are my re-purposed candle jars:

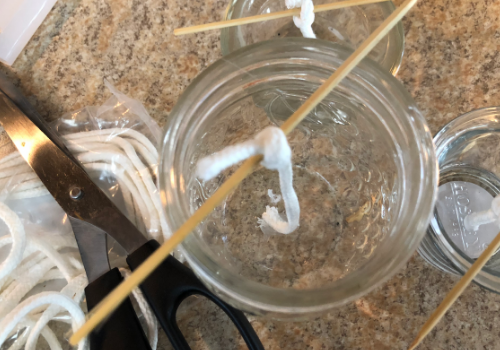
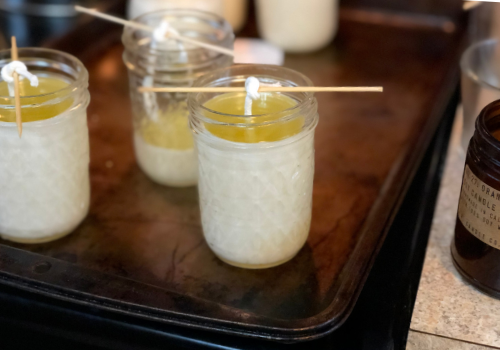
Step 2: Set out all of your empty candle jars and plug in your hot glue gun. Cut your wicks to be the height of your candle, plus a knot above. If you scroll down to the photos below, you'll see why.
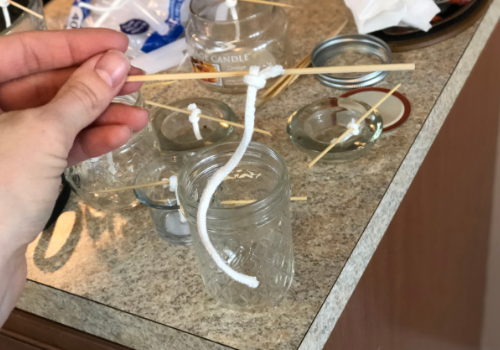
Step 3: Tie the wicks onto either a thin pencil/chopstick or ideally, a bamboo skewer. The thinner the item, the less wick you waste because you will end up cutting this part off at the end. Then, hot glue the end of the wick to the bottom of the jar. If you don't have a hot glue gun, there is another option- when you go to pour the beeswax in Step 6, instead of filling up the entire jar, you will only fill the bottom 1/2 inch and let it cool. This acts as the "glue" to hold the wick in place when you later fill the rest of the jar with beeswax. I have not personally had much success with this version- I have found that it's very hard to get the wick to stay in the correct spot while the wax cools, which is why I prefer to glue them in place. But the choice is yours!
Step 4: When your beeswax is completely melted, turn off heat and place pitcher on a hot pad on the counter. Add in 1/2 cup of melted coconut oil. The coconut oil actually helps your candle to burn more consistently.
If you don't want a scented beeswax candle, you can skip to Step 6: otherwise, read on.
Step 5: For 1lb of beeswax, you need at LEAST 150 drops of essential oil for it to smell like much of anything. I would recommend closer to 200. Personally, I figure if I'm going to all the trouble to make the candle, it might as well smell totally amazing! I typically purchase 1-2 small bottles of essential oils specifically for my candles each time I make a big batch of them- I almost always have extra to use in my diffuser, and it allows me to make some fun combinations without breaking the bank. I like to use Plant Therapy's essential oils due to their purity and affordability.
Step 6: Pour! Make sure to pour in the space around the wick and bamboo skewer.
Step 7: Let cool. I try my best to let this happen overnight, so they're fully set before I go clipping the wicks off.
Step 8: Trim the wicks! Your goal is to trim them to be about 1/2 inch in length. If they're too short, your candle will tunnel when it burns- leaving a chunk of the edge of the wax un-melted. If your wick is too long, you'll know it - it will smoke! If this happens, simply blow the candle out and trim a bit shorter.
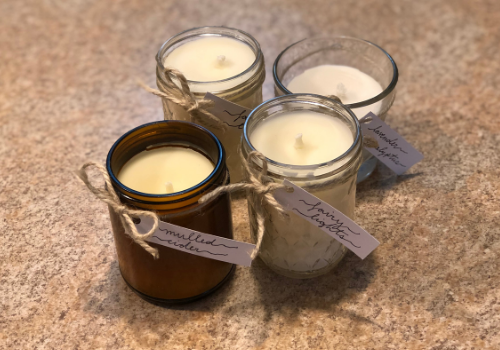
Step 9: This is totally optional, but I love to put little labels on my candles! When I set aside some time to make candles, I'll typically make all 5lbs in one day. I do 1lb batches. The reason for this is because I make 5 different scented waxes, which equals about 3 candles of each scent. Because they obviously do not all smell the same, I like to label them to help me remember which is which! They're nothing fancy- some white cardstock and twine.
These candles make amazing gifts, and are so easy! I hope you try this recipe and love it as much as I do. Somehow, they're even more enjoyable when I make them myself!
-------------
Join over 3,000 other local parents in receiving our family-friendly event calendar for the Williamsport/Muncy/Jersey Shore area right to your inbox every Monday morning! Know of an event you want to share with other parents looking for fun things to do with their kids? Submit an event here! Tired of searching different websites for events geared toward your kids? Hop over to our event page to see what family-friendly activities are happening in the Williamsport area!